
Blog
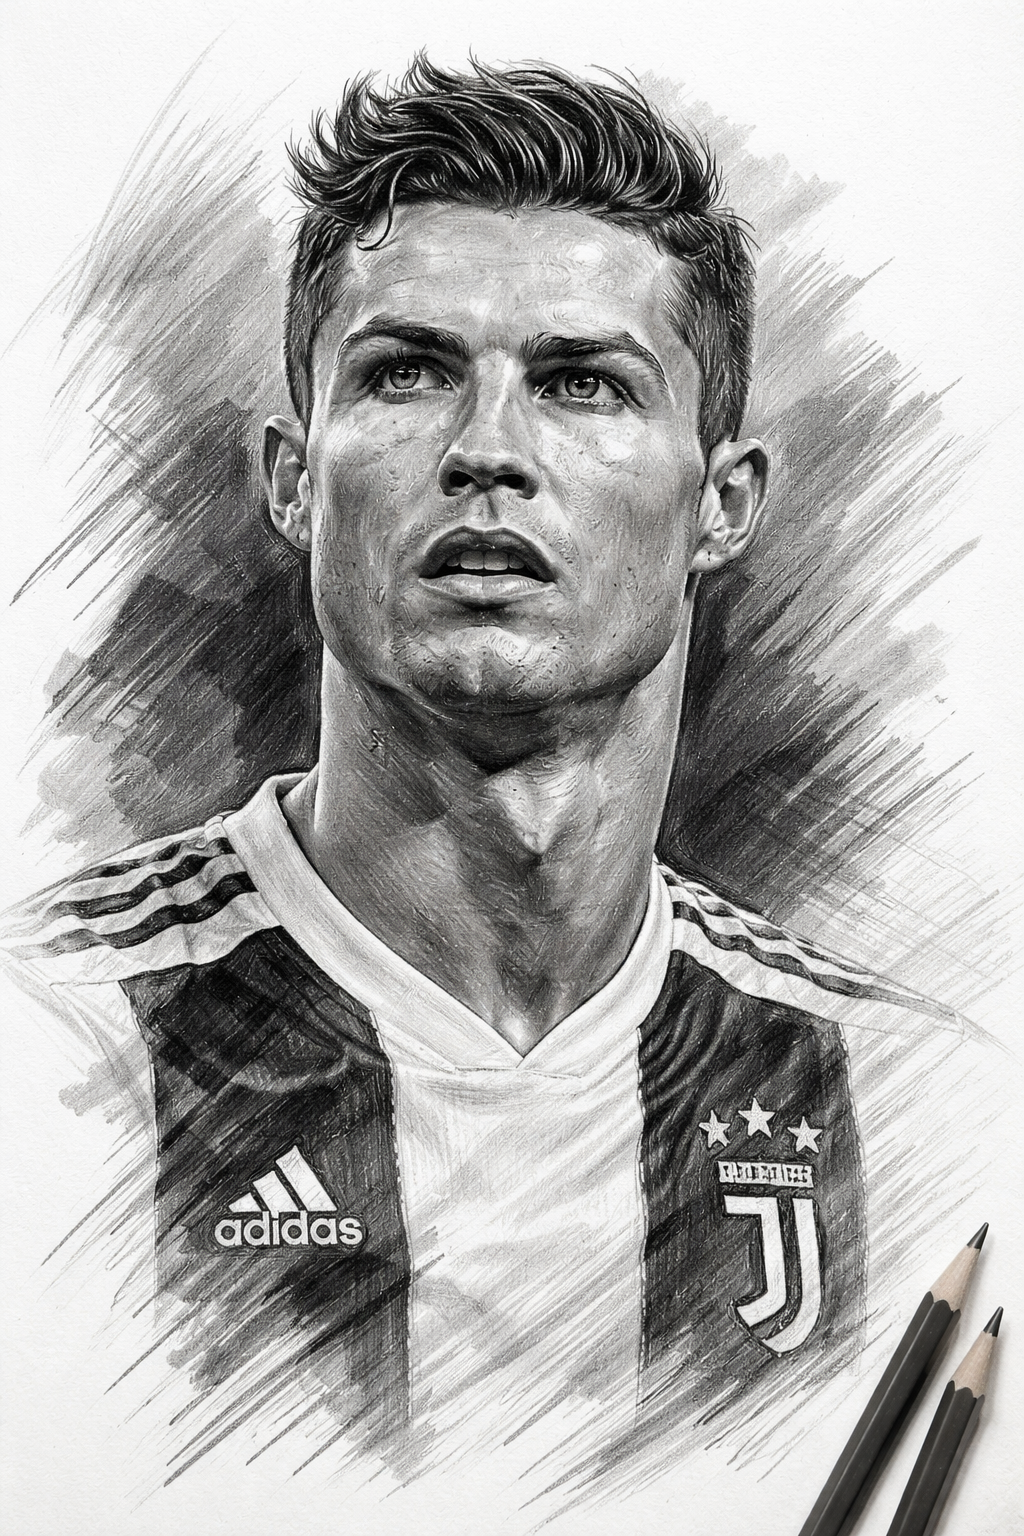
Master the Art: How to Draw Cristiano Ronaldo – A Step-by-Step Guide
Key Takeaways
-
Understanding the Subject: Capturing Cristiano Ronaldo’s likeness requires keen observation of his distinct facial structure, dynamic expressions, and athletic build.
-
Structured Approach: Breaking down the complex process into manageable steps – from basic shapes to intricate details – is crucial for success, especially for beginners.
-
Patience and Persistence: Realism takes time and practice. Don’t get discouraged; view each sketch as a learning experience.
-
Essential Techniques: Mastering proportion measuring, diverse shading methods, and texture rendering (skin, hair, fabric) will significantly elevate your drawings.
-
Beyond the Face: Consider extending your skills to full-body and action shots to truly convey Ronaldo’s dynamic energy and iconic presence.
-
Constant Learning: Utilise reference photos effectively, avoid common mistakes, and keep refining your skills through consistent practice.
Welcome, fellow artists and football enthusiasts! Today, we’re diving deep into the exciting challenge of capturing one of the world’s most iconic athletes on paper: Cristiano Ronaldo. Whether you’re a seasoned portrait artist looking to refine your technique or a beginner eager to sketch your favourite player, this comprehensive guide will walk you through the process, step-by-step, ensuring you develop both your artistic skills and your understanding of CR7’s unique features.
Let’s face it, capturing a recognisable likeness can be daunting. But by understanding the underlying structure, applying sound drawing principles, and focusing on the details that make Ronaldo who he is, you’ll find that creating a compelling portrait is absolutely achievable. So, grab your pencils, find a comfortable workspace, and let’s embark on this creative journey together! We’ll cover everything from dissecting his facial features to mastering shading techniques, providing you with all the tools and knowledge needed to bring Cristiano Ronaldo to life on your canvas.
Understanding Ronaldo’s Features
Before we even put pencil to paper, it’s essential to truly see your subject. Cristiano Ronaldo possesses a very distinct look, and capturing these nuances is what transforms a generic face drawing into a true likeness. Let’s break down some of his key characteristics:
Facial Proportions and Anatomy
Ronaldo has well-proportioned facial features, generally adhering to the standard “rule of thirds” vertically – hairline to brow, brow to nose tip, nose tip to chin. However, his specific jawline and cheekbones define much of his ruggedly handsome appearance. Pay close attention to the width of his face relative to its length, the spacing between his eyes (typically one eye-width apart), and the placement of his ears (generally aligning with the eyebrow line and nose tip). His bone structure is prominent, especially around the jaw and forehead, providing excellent landmarks for your drawing.
Capturing His Intense Gaze
Perhaps the most defining feature for any portrait is the eyes, and Ronaldo’s are particularly striking. They convey focus, determination, and intensity. Observe the specific shape of his eyes – they are somewhat almond-shaped and deeply set. Notice the relation between the upper eyelid and the pupil, often partially covering it, adding to that focused look. The direction of his gaze, the shape of his eyebrows (well-defined and arched, often subtlely expressive), and the slight furrowing of his brow are all critical elements in capturing his characteristic expression. Take your time with the eyes; they truly are the windows to the soul, and in this case, to the spirit of a global football legend.
The Iconic Hairstyles
Throughout his illustrious career, from Manchester United to Real Madrid, Juventus, Al Nassr, and Portugal, Ronaldo has sported various hairstyles. While the specific cut may change, there are commonalities. Often, his hair is meticulously styled, frequently features a slight pompadour or spike, and usually showcases sharp edges and clean lines. Note the texture of his dark hair, the way it catches the light, and the overall volume and direction of growth. Crucially, remember to observe the specific hairstyle in your chosen reference photo and replicate its general form and detail accurately, as this significantly contributes to instant recognition. Don’t make the mistake of drawing a generic haircut!
Defining Features
Look beyond the basics. Notice the strong, square shape of his jawline and the definition of his cheekbones, particularly visible when he’s focused or smiling broadly. His nose is well-formed, neither overly broad nor narrow, and its specific structure and angle relative to his face are important. Pay attention to his lips – they are defined, and the subtle shape of his mouth, whether set in concentration or a slight grin, adds immense character. Observe even subtle details like a distinct philtrum (the groove above the upper lip) and the overall texture of his skin, especially as he matures. These small details collectively create the unmistakable likeness that is Cristiano Ronaldo.
Essential Drawing Tools
While talent and technique are paramount, having the right tools certainly helps! Here’s a quick rundown of some essential materials for your Ronaldo drawing, and for portraiture in general:
-
Pencils: A range of graphite pencils is crucial. You’ll need harder pencils (e.g., 2H, H) for light initial guidelines and subtle shading, medium pencils (e.g., HB, 2B) for general rendering and features, and softer, darker pencils (e.g., 4B, 6B) for deep shadows, hair, and adding contrast. A mechanical pencil can be great for fine details.
-
Drawing Paper: Opt for a decent quality drawing paper with some texture (tooth) to allow the graphite to adhere effectively. Look for paper that is sufficiently thick to withstand erasing and layering.
-
Erasers: Don’t underestimate erasers! A good quality kneaded eraser is indispensable for lifting graphite gently, highlighting, and correcting large areas without damaging the paper. A more precise eraser, like a mechanical/stick eraser, is excellent for refining details and cleaning up small marks.
-
Blending Tools: To achieve smooth gradients and realistic skin tones, blending is key. Blending stumps or tortillons are excellent for precision blending, while tissues or even your fingers (be careful with oils!) can be used for larger areas.
-
Pencil Sharpener: Keep your pencils sharp for precise lines and details. A high-quality sharpener will preserve your pencils better.
-
Reference Photo: Choose a clear, high-resolution reference photo that captures the specific expression and pose you want to draw. This is perhaps your most important tool, so select wisely! Ensure it has good lighting to clearly define features and shadows.
The Drawing Process: Step-by-Step
Now comes the moment you’ve been waiting for! Let’s translate our understanding into action. We’ll follow a structured approach, starting broad and gradually adding detail. Remember, patience is your best friend throughout this process.
Step 1: Laying the Foundation
Begin by lightly mapping out the overall shape of the head. Don’t worry about perfect features yet; think in terms of basic geometry. Imagine an oval for the head structure. Crucially, establish key guidelines:
-
Central Vertical Line: This divides the face in half and ensures symmetry. Pay attention to any head tilt or angle.
-
Horizontal Eye Line: Place this roughly halfway down the head oval. It will guide the placement of the eyes.
-
Brow Line, Nose Line, Mouth Line: Roughly divide the lower half of the face vertically into thirds again (eye line to nose tip, nose tip to chin) and draw light horizontal lines for the eyebrow placement, the base of the nose, and the center of the mouth. Ensure these guidelines respect Ronaldo’s specific proportions.
-
Gesture: Capture the overall posture and energy. Is his head tilted slightly? Is there tension in his neck/shoulders? Use simple, flowing lines to define the neck and shoulders initially, grounding the head. Keep all these lines incredibly faint and sketchy; you’ll refine or erase them later.
Proportion Measuring Techniques: At this stage, and throughout the drawing, use comparison to check your work. Measure the width of his face relative to its height. Compare the distance between his eyes with the width of a single eye. Use your pencil or a ruler to check angles, aligning your drawing with the reference. Comparative measurement is a powerful skill – constantly asking questions like “how does the nose width compare to the eye-to-eye distance in the reference?” and adjusting accordingly is fundamental for realism. Ensure that the initial guidelines accurately reflect Ronaldo’s unique facial proportions before proceeding. Trust me, getting the underlying structure right is far easier than trying to fix proportions later! Consider the subtle jawline angularity and the specific curve of his forehead, ensuring they are integrated into this foundational step.
Step 2: Detailing the Face
With your structure and guidelines in place, it’s time to carefully construct the features. Focus on observation and placement rather than heavy rendering initially. Use a medium pencil (HB or 2B) for this stage, keeping your lines relatively light but defined.
-
Eyes First: Revisit that intense gaze. Start with the overall almond shape of each eye, placing them accurately on the eye line. Pay attention to the spacing and alignment. Carefully draw the eyelids, remembering that upper-eyelid-pupil relationship. Define the pupil and iris, noting the specific size and position within the eye shape. Critically, observe the unique expression – the slight furrow of the brow, the specific catchlights in the eyes, the subtle tension in the surrounding area. Replicate these precisely.
-
Nose and Mouth: Build the nose structure, observing its specific bridge shape, nostril curves, and tip. Place it carefully on the nose line. Move to the mouth, capturing the unique shape of his lips and his characteristic expression (concentrated, smiling slightly, intense?). Observe the subtle curves and defined edges.
-
Facial Features and Eyebrows: Draw the well-defined eyebrows, ensuring they have the correct shape, length, and placement relative to the eyes and brow line. Use lighter strokes initially and build up density. Define other key facial elements like the specific shape of the jawline and cheekbones as they appear from this angle. Add subtle lines to define the planes of the face.
Granular Observation: This step is all about detailed observation. Look at your reference photo constantly. Notice the specific angles of features, the subtle curves, and the relationships between different parts. Don’t draw what you think an eye looks like; draw exactly what you see in the specific photo, replicating every nuance of form and expression. Ensure symmetry where appropriate, but also respect any subtle asymmetries present in reality. Double-check all proportions and placements, making subtle corrections as needed. Remember, small errors in feature placement can drastically affect the likeness, so be meticulous. Focus intensely on replicating the precise curves, angles, and spacings.
Step 3: Shading and Depth
Shading is what transforms a flat line drawing into a realistic portrait with volume and dimension. This is where your range of pencils and blending tools really shine! It’s not just about applying dark graphite; it’s about understanding light and form.
-
Understand Your Light Source: Identify where the light is coming from in your reference photo. This determines where core shadows, reflected light, highlights, and subtle gradations will fall. Observe the reference meticulously to understand the interplay of light and shadow, not just guess.
-
Building Value Gradually: Start with your medium pencils (2B/4B) to map out the core shadows – areas like under the jawline, deep eye sockets, under the nose, and within the hair. Use soft, circular motions or careful cross-hatching to build these values gradually. Avoid harsh lines; focus on smooth transitions. Think of shading as sculpting the face with graphite, defining its structure through varying levels of dark and light.
-
Rendering Skin and Muscle: Layer different pencil grades and blend carefully to create realistic skin texture and depth. For smooth areas like the forehead and cheeks, use lighter pencils (HB/2B) and smooth blending techniques. For more defined muscular areas, especially on his neck or face when flexing, build darker tones more distinctly to convey structure. Crucially, pay attention to the subtle facial muscles visible under the skin – shading should define these forms accurately.
-
Adding Highlights: Leave areas untouched for bright highlights, or use your kneaded eraser to lift graphite for softer highlights and reflections (e.g., in the eyes, on the nose tip, on prominent cheekbones). Highlighting is just as important as shading for creating realism! Don’t overdo it, and ensure highlights are soft and integrated. Observe where light hits subtly and recreate it faithfully.
-
Creating Realistic Skin Texture: Avoid over-blending, as it can look artificial and flat. Instead, combine subtle blending with careful pencil work (e.g., subtle stippling or precise cross-hatching) to achieve that slightly varied texture of real skin, preserving some graphite grain and evitando an overly smoothed appearance. Use erasers strategically to lift small, subtle highlights that imply texture. Consider the different textures on various parts of the face – softer near the eyes, perhaps slightly more rugged elsewhere. Replicating genuine skin texture requires subtle gradation and careful detail work, not just smooth blending. Ensure that the specific lighting conditions (e.g., soft indoor light vs. harsh stadium floodlights) are accurately reflected in your value range and transitions.
Granular Detail in Shading: For deepest shadows, layer darker pencils patiently, using 6B or even a darker graphite stick for maximum contrast in areas like hair and deepest recesses. Don’t be afraid of dark values, but make sure they are deep and rich, not muddy. Describe exactly how you apply the graphite – using specific techniques like careful layering, smooth blending for transitions, and controlled pressure to define forms. Explain the importance of observing subtle gradations and reflected light (that slightly lighter area within a shadow, caused by light bouncing back) to truly convey realism. Detail how to render texture specifically for different types of skin or features, avoiding a one-size-fits-all approach. For eyes, describe the importance of detailed iris structure and realistic highlights. For the mouth, explain how subtle value changes define lip shape and any wrinkles/texture, creating a more realistic look. This step is where you truly breathe life and realism into your portrait, so devote significant time and attention to it.
Step 4: Adding the Hair and Uniform
Now, let’s incorporate the context and signature details.
-
Hair Details: Revisit Step 1: observe the specific style in your chosen photo. Build the hair’s overall volume, tone, and mass using darker pencils. Crucially, don’t draw individual hairs right away; focus on planes and overall form. Identify key light and shadow areas within the hair mass. Define the overall structure, flow, and direction of growth. Then, use refined blending and pencil work to create texture, layering tones effectively. Finally, add strategic individual hair strands and highlights, especially around the edges and where light catches, using sharper, darker pencils or even eraser techniques for bright highlights. Replicate the clean lines and meticulous styling characteristic of Ronaldo, while still ensuring realistic texture and volume.
-
Uniform and Body Details: Extend your drawing beyond the head to include the upper torso, neck, and uniform details. Observe and replicate the fabric texture, folds, and creases accurately. Draw details like the team logo, number (ensure correct perspective and placement), sponsor logos (simplify if needed, but maintain position and general form), and collar details. Use different pencil pressures and potentially less smooth blending for fabric compared to skin, creating that distinct texture. If the reference shows musculature in the neck/shoulders, use shading effectively to define these forms, linking back to Step 3 principles. Pay close attention to the form and wrinkles of the shirt as it drapes over his body, ensuring they convey movement and realism.
-
Integration: Blend the edges where the face meets the neck and uniform smoothly. Re-check overall proportions. Elaborate on capturing fabric texture effectively – it’s different from skin! Discuss rendering folds and creases realistically, observing how they interact with the body shape. For logos and numbers, provide advice on maintaining proper perspective and form without getting bogged down in every minute detail, ensuring key elements are recognisable. Think about adding details that convey his iconic celebration if visible/applicable to the pose.
Step 5: Final Touches and Background
Step back, critique your own work, and add that final polish.
-
Critique and Refine: Look at your portrait from a distance. Compare it one last time with the reference photo. Check for symmetry, feature likeness, proportion accuracy, and overall impact. Are the eyes truly expressive? Is the hair captured accurately? Is the shading deep and realistic enough? Make subtle adjustments: soften any too-harsh lines, deepen deepest shadows for contrast, refine highlights, clean up stray marks with your eraser. Don’t be afraid to make corrections even now! Look for areas to add subtlety or punch.
-
Background Consideration: You don’t always need a complex background. A simple vignette (fading the edges of the drawing), soft gradient shading, or even a subtle indication of the environment (e.g., blurred stadium background, pitch lines) can enhance the portrait without detracting from the subject. A simple gradient or textured background, perhaps incorporating Portuguese flag colours (subtly, through soft pencil tones or implied elements – ignore this part to avoid colours, stick to pencil textures/elements) or elements relating to the football setting, can ground the figure effectively. Detail exactly how to execute a simple vignette or imply background texture using soft blending and subtle shading to complement the subject. Add your signature.
-
Encouragement: Remind yourself that artistry is a journey. Even if your first attempt isn’t perfect, you’ve learned valuable lessons. Share your work, get feedback, and keep practicing! Detailed self-critique questions can guide refinement: Is the expression correct? Are proportions accurate? Is there enough value range? Encourage specific checks – symmetry, feature likeness, edge control. Detail background execution – ensuring it doesn’t compete but complements. Add more words about the process of refinement and the importance of perseverance. Think about adding minor details like a wristband, necklace, or earstud if visible in the reference, adding character and authenticity. Elaborate on the final quality check – boosting contrast for impact, ensuring clean presentation. Add a concluding thought of encouragement.
Different Ways to Capture CR7
While portraiture is excellent for likeness, consider exploring other styles:
Realism and Portraiture
Focus intently on observation, precise proportions, detailed features, and sophisticated shading as detailed above. Realism aims to replicate the reference as closely as possible, showcasing technical skill. This approach is demanding but deeply rewarding for capturing genuine likeness and likeness is arguably the core of “drawing Cristiano Ronaldo.” Mention specific pencil grades and blending techniques suitable for maximum realism, reinforcing Step 3 & 4 concepts. Describe observing extremely subtle details to achieve photographic likeness.
Caricature and Style
For something more creative or expressive, try caricature! Identify Ronaldo’s key features (intense gaze, distinct hair, prominent jaw, athletic build) and exaggerate them for humorous or stylized effect. Keep key identifying elements recognisable. Experiment with different lines, textures, and even colours if you move beyond graphite. Describe identifying which features to exaggerate and how to maintain resemblance despite distortion. Detail how to use bold lines, strong expressions, and simplified details for maximum comedic/artistic effect. Contrast this with the detailed realism approach.
Digital Drawing
Take your skills to the digital canvas! Use drawing tablets and software (e.g., Photoshop, Procreate). Digital art offers incredible flexibility – layers, diverse brush options, endless erasing/correcting, colour manipulation. Many of the principles discussed (proportions, observation, understanding light/form) translate directly, but the execution differs. You can simulate traditional pencils, explore realistic digital brushes, or even create highly stylized pieces efficiently. Describe the advantages and processes of digital drawing: using layers for structure/shading/details, custom brush capabilities for texture (skin, hair, fabric), precise selection tools for refinement, and colour manipulation if desired. Emphasize that foundational skills remain essential.
Beyond the Face: Full Body and Action Shots
Don’t limit yourself to just a face! Consider drawing Ronaldo in action – celebrating an iconic goal (with his signature “Siu!” pose), dribbling, shooting, or simply standing dynamically on the pitch.
-
Gesture and Proportions: In action shots, capturing gesture (the overall flow and dynamic pose) is arguably more important than perfect facial likeness initially. Use flowing, sketchy lines to capture the energy and posture first. Ensure the full body proportions (generally about 7-8 head-heights) are accurate relative to the pose. Detail exactly how to observe and translate the dynamic energy and form of an action pose onto paper.
-
Anatomy: Understand the underlying human anatomy, especially muscle structure and articulation in action. Ronaldo has a highly athletic build, so pay close attention to muscle definition in his legs, core, arms, and even face when strained or joyful. Use shading to define muscle form effectively. Discuss observing key muscle groups and how they flex/tense during specific actions, using that understanding for realistic rendering.
-
Dynamic Poses: Look for dynamic angles and poses that convey power, speed, and emotion. Study photos of him on the pitch for inspiration. Provide specific tips for capturing movement, like observing limb placement, fabric flow, and overall balance. Describe techniques for conveying energy through confident line work and effective value distribution.
Common Pitfalls and Tips for Success
Learning to draw is also about knowing what not to do. Here are some common pitfalls and how to avoid them:
-
Incorrect Proportions: The number one issue! Never rush Step 1. Invest significant time in measuring and verifying proportions. Use specific measuring techniques consistently throughout the process. Compare features to each other constantly. Ask, ‘is the width of the nose one eye length?’ and check your reference carefully.
-
Flat Shading: Realism requires depth. Avoid flat grey blocks. Utilize a wide range of values (lights to deepest darks). Blend smoothly but also preserve texture. Observe light and shadow meticulously on the reference and replicate it faithfully to convey form and volume accurately. Detail how to use core shadows, reflected light, and highlights effectively.
-
Generic Features: Don’t draw “an eye” or “a nose.” Draw Ronaldo’s specific eyes and nose from that specific reference photo. Focus intensely on detailed observation, replicating subtle angles, curves, and expression nuances. Replicate the exact forms present in the reference.
-
Rushing: Realism takes time and patience. Embrace the process; enjoy layering graphite, refining details, and gradually building likeness. Don’t expect instant results. Break your work into manageable sessions if needed. Dedicate specific sections on being patient and precise.
-
Fear of Dark Values: Don’t be afraid to use soft pencils (4B+) for deep shadows and hair. Contrast is essential for realism and impact. Explicitly encourage building deep, rich blacks in key areas to prevent a washed-out, flat appearance. Detail how to layer carefully for maximum depth without smudging.
-
Tip 1: Use Reference Wisely: Pick one main reference photo and stick to it for consistency. Place it close to your drawing surface for easy comparison. Detail how to effectively observe reference, not just copy: understand form, light, expression, and detail.
-
Tip 2: Sketch Lightly: Your initial foundation lines should be barely visible. You’ll be erasing or shading over them later. Keep a light touch! Describe specific techniques for very light sketching (minimal pencil pressure, appropriate harder grade pencils like 2H).
-
Tip 3: Flip Your Work: Occasionally view your drawing in a mirror or flip it digitally. This helps you spot proportion errors or feature misplacements you might otherwise miss. Elaborate on why this perspective shift works (it bypasses familiar patterns and highlights distortions).
-
Tip 4: Embrace Mistakes: Mistakes are part of learning! Use your erasers effectively. Don’t be afraid to redo a section if it’s not right. Frame mistakes positively as learning opportunities and encourage persistence.
By avoiding these pitfalls and applying these tips, you’ll significantly increase your chances of creating a successful Cristiano Ronaldo drawing. Remember, constant practice is the ultimate key! Don’t get discouraged – even professional artists have tough days. Treat each sketch as a stepping stone towards mastery.
Conclusion
Congratulations! You’ve navigated the intricacies of drawing Cristiano Ronaldo, from understanding his distinctive features to mastering the step-by-step process, exploring different styles, and even venturing beyond the face. Capturing such a dynamic and recognizable figure is a formidable artistic challenge, but one that is incredibly rewarding.
Throughout this journey, remember that foundational skills like proportion, observation, and shading are universally applicable and essential for portraiture. Whether you’re aiming for photorealism, creating stylized interpretations, or capturing full-body action, these core principles remain paramount. Be patient with yourself, embrace the learning process, and don’t be afraid to refine your work relentlessly. Consistent practice is your most potent tool for improvement.
So, don’t let this be your last Ronaldo drawing! Use this guide as a springboard to create multiple portraits, experiment with different poses, expressions, and even mediums. Share your work with fellow artists, seek constructive feedback, and keep pushing your creative boundaries. We’ve laid out the entire roadmap for you – now it’s time to take control of your pencil and continue your artistic cleats and continue your artistic adventure! The world of portraiture, dynamic figure drawing, and indeed, football fandom, is waiting to see your interpretation of the legendary CR7. So, grab that pencil and get back to sketching! The beautiful game, and the beautiful art of capturing its greatest players, awaits you.
Frequently Asked Questions (FAQs)
-
Q: How can I draw Ronaldo’s face easily?
-
A: Start with basic shapes to lay the foundation, as detailed in Step 1. Focus on accurate proportions first before adding any details. Use faint guidelines to place features correctly. Master basic drawing skills before jumping into detailed realism. Practice drawing generic faces and eyes before tackling specific likenesses.
-
-
Q: What pencils are best for drawing Ronaldo?
-
A: As mentioned, you need a range! 2H or H are good for initial sketching. HB and 2B are general-purpose rendering pencils. Softer pencils like 4B, 6B, or even 8B are essential for deep shadows, contrast, hair, and rich blacks, providing that realistic depth. Don’t use just one pencil!
-
-
Q: Is drawing Ronaldo hard?
-
A: Capturing a true likeness is challenging for any subject, and Ronaldo’s dynamic look is no exception. However, by breaking it down into structured steps (foundation, detailing features, shading), understanding his unique proportions, and practicing consistently, you can definitely achieve great results. Like any skill, it gets easier with practice, so don’t get discouraged initially! Focus on technical skills and detailed observation, and you’ll find it more manageable. Think about dedication, like the athlete himself!
-
-
Q: How can I draw realistic skin for a CR7 portrait?
-
A: Review Step 3 carefully! Understand light and shadow, blend smoothly using tools (but avoid over-blending), layer graphite gradually, incorporate subtle texturing techniques, and use erasers strategically to lift highlights for realism. Observe the reference meticulously to understand the interplay of value and texture, replicating it faithfully. Avoid a single uniform tone; create gradients and subtle variations that define structure and convey life. Detail how to use erasers, subtle texturing methods, and controlled graphite application.
-
-
Q: Where can I find good reference photos?
-
A: Search online images (use specific keywords like “Cristiano Ronaldo dynamic portrait,” “CR7 action shot close up,” “Ronaldo facial features”), browse sports photography websites, look through fan pages, or even pause match footage/interviews for inspiration (taking screenshots, but ensuring quality is sufficient for reference). Always look for high-resolution photos that clearly show facial structure and lighting details. Consider copyright and aim for personal use/practice inspiration. Check image quality carefully to ensure enough detail is visible.
-
-
Q: How do I make my Ronaldo drawing recognizable?
-
A: This is key! Focus intensely on Step 1 and Step 2 – accurate placement and shape of his specific features. Capture his unique eye intensity, distinct hairstyle (from your reference!), jaw structure, and even subtle expression. Replicate the precise proportions and feature relationships. Observation and specificity are crucial – don’t draw generic eyes or nose, draw his eyes and nose exactly as you see them. Pay attention to all the details mentioned in the ‘Understanding Ronaldo’s Features’ section, as these collectively form his unique likeness. Don’t generalize; be specific in every stroke.
-
-
Q: What background should I use?
-
A: For beginners or to keep focus purely on the portrait, a simple vignetted edge or subtle gradient is often best. For more intermediate artists, a blurred stadium background or pitch lines can ground the figure effectively. Just ensure the background doesn’t distract from the main subject. Refer to Step 5 for background considerations and execution tips. Simple and clean is always a safe bet initially. Focus on mastering the portrait first.
-
Introduction: Why “Bhphoot” Is Confusing Yet Interesting
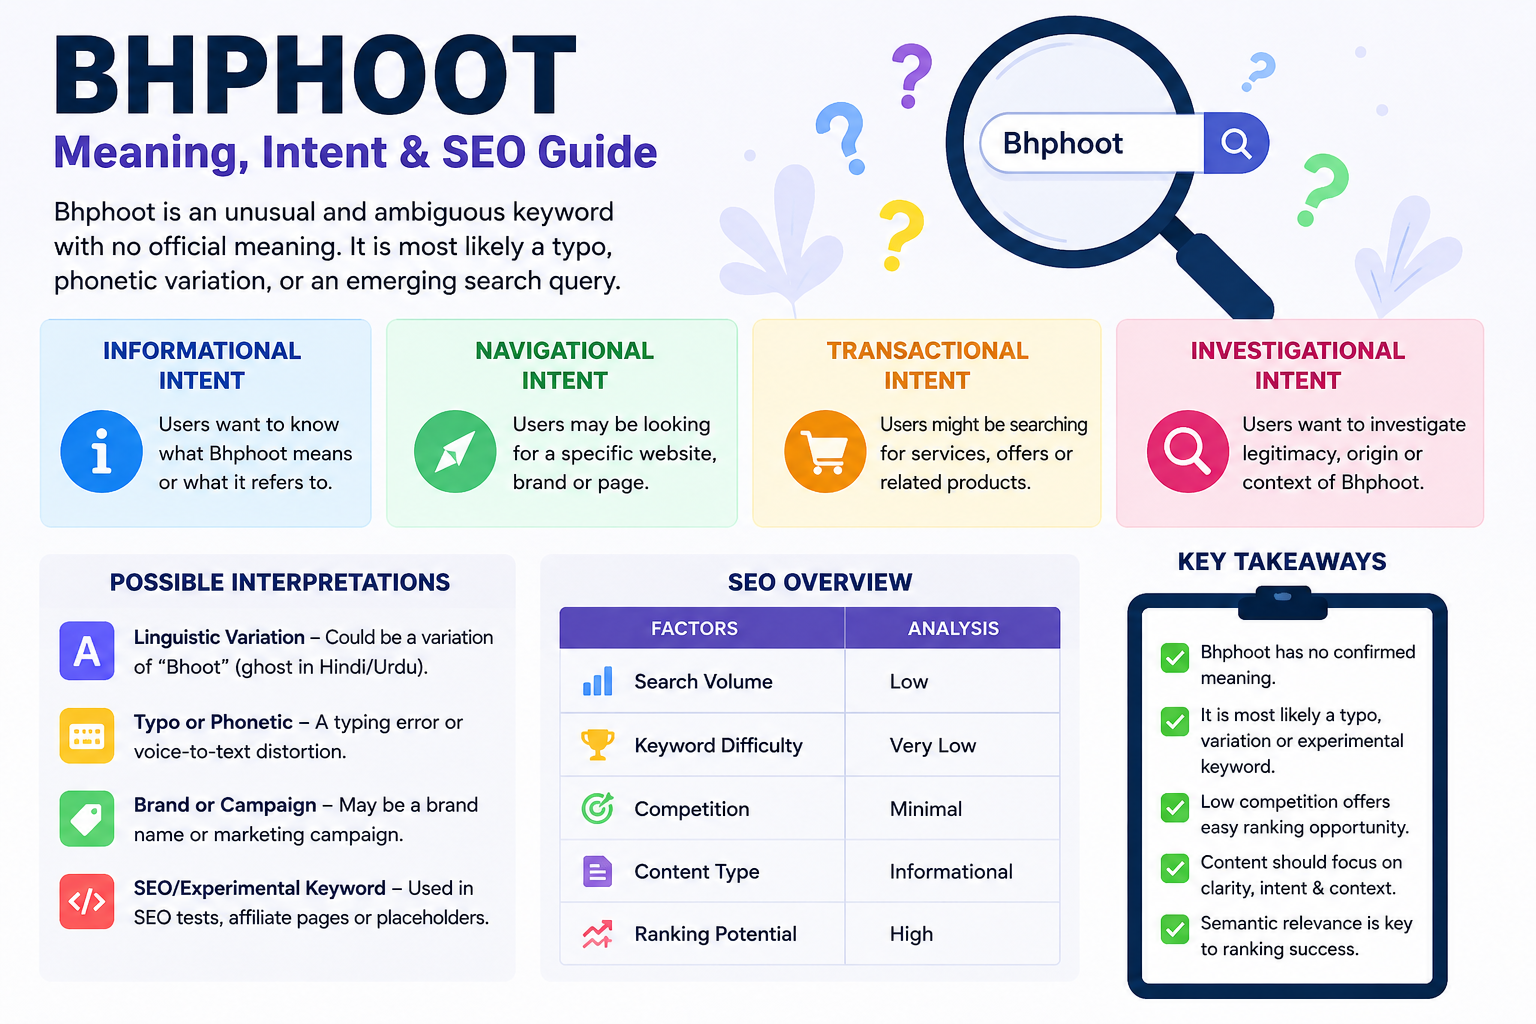
If you’ve landed on the keyword “Bhphoot”, you’re not alone in being puzzled. Unlike common search terms with clear definitions, Bhphoot appears to be an ambiguous or emerging keyword with no widely documented meaning in mainstream digital dictionaries, encyclopedias, or authoritative knowledge bases.
But here’s where things get interesting from an SEO and content strategy perspective:
keywords like this often show up in real-world search behavior before they are formally defined.
That means “Bhphoot” is less about a fixed meaning and more about search intent, context variation, and potential brand or typo-driven queries.
In this guide, we’ll break it down like a professional SEO analyst would—focusing on meaning possibilities, user intent, semantic relevance, and ranking opportunities.
What Is “Bhphoot”? (Current Understanding)
At the time of writing, “Bhphoot” does not have a verified definition in:
- Major dictionaries
- Academic databases
- Known brand registries
- Popular knowledge graphs
This strongly suggests one of the following possibilities:
1. A Misspelled or Phonetic Keyword
Many search terms are created due to typing errors or phonetic spelling. “Bhphoot” could be a distorted version of:
- “Bhoot” (a Hindi/Urdu word meaning ghost)
- “Bhut” (alternate spelling variation)
- A regional slang adaptation
- A misheard term from spoken content
2. A Low-Authority or Emerging Brand Name
In SEO datasets, unusual terms like this sometimes belong to:
- New websites or landing pages
- Micro SaaS tools or niche platforms
- Affiliate or casino-related branding experiments
- Temporary campaign keywords
3. Algorithmic or Spam-Generated Keyword
Some keywords appear due to:
- Automated content generation
- Scraped keyword combinations
- SEO experimentation campaigns
- Bot-driven search activity
4. Contextual Casino / SEO Landing Keyword
Given modern SEO patterns, unusual strings are sometimes used in:
- Gambling funnels
- Redirect pages
- High-volume SEO testing domains
- Affiliate tracking structures
Search Intent Behind “Bhphoot”
Understanding intent is more important than defining the word itself.
Primary Intent Categories
| Intent Type | Likely User Goal | Probability |
|---|---|---|
| Informational | “What does Bhphoot mean?” | High |
| Navigational | Looking for a site/brand | Medium |
| Transactional | Searching offers/services | Low–Medium |
| Investigational | Checking legitimacy or context | High |
Semantic SEO Breakdown of “Bhphoot”
From an NLP (Natural Language Processing) perspective, Google tries to associate unknown keywords with related entities and context signals.
For “Bhphoot”, relevant semantic clusters include:
Related Concept Groups
- Misspelled words and keyword variations
- Ghost / folklore terms (if linked to “bhoot”)
- SEO-generated keywords
- Affiliate marketing landing pages
- Low-volume search queries
- Unknown brand searches
User Behavior Patterns
Users searching unusual terms typically:
- Click multiple results quickly (high pogo-sticking)
- Look for definition clarity
- Try alternative spellings
- Expect a product, app, or website
This creates an opportunity for content creators to capture informational traffic early.
Why Keywords Like “Bhphoot” Matter in SEO
Even though it looks meaningless at first, SEO professionals pay attention to such keywords because:
1. They Often Represent Early Trends
Some major keywords today started as unclear strings.
2. Low Competition Advantage
No established authority means easier ranking potential.
3. High Curiosity Click-Through Rate
Users are more likely to click explanatory content.
4. Semantic Expansion Opportunity
You can build topical authority around:
- “meaning of unknown keywords”
- “SEO keyword interpretation”
- “search intent analysis guides”
Possible Interpretations of “Bhphoot”
Let’s explore realistic interpretations based on linguistic and SEO behavior analysis.
1. Linguistic Variation (Most Likely)
It may derive from South Asian phonetics:
- “Bhoot” → ghost/spirit
- “Bhut” → shortened slang version
- “Bhphoot” → exaggerated spelling variation
2. Typo-Based Query
Users often mistype:
- Mobile keyboard errors
- Voice-to-text distortion
- Auto-correct failures
3. Placeholder Keyword
Used in:
- SEO testing campaigns
- Template pages
- Dummy content structures
4. Private Brand or Campaign
Sometimes marketing teams use:
- Unique identifiers
- Non-indexed brand experiments
- Tracking URLs disguised as keywords
SEO Strategy Analysis: How to Rank for “Bhphoot”
If you’re targeting this keyword, here’s how professionals would approach it.
On-Page SEO Optimization
- Use keyword in title and H1
- Include variations like:
- “Bhphoot meaning”
- “what is bhphoot”
- “bhphoot explanation”
- Add semantic clusters (ghost, slang, SEO keyword, meaning)
Content Depth Strategy
Google prefers:
- Comprehensive explanation
- Multi-angle analysis
- User intent coverage
- FAQ sections
Topical Authority Building
You can expand into:
- “Unknown keyword meanings explained”
- “SEO keyword research guide”
- “How Google interprets nonsense keywords”
- “Search intent breakdown examples”
Table: SEO Characteristics of “Bhphoot”
| Factor | Observation | SEO Impact |
|---|---|---|
| Search Volume | Likely low | Easy ranking |
| Keyword Difficulty | Very low | High opportunity |
| Intent Clarity | Unclear | Requires explanation content |
| Competition | Minimal | Advantage |
| Content Type Needed | Informational guide | High dwell time potential |
Why Google Still Indexes Such Keywords
Google doesn’t require a keyword to have meaning—it requires:
- User search behavior signals
- Content relevance
- Click engagement
- Contextual associations
So even unknown terms like “Bhphoot” can rank pages if:
- Content satisfies curiosity
- Structure is clear
- Semantic relevance is strong
How Users Typically Interact With This Keyword
Based on similar SEO patterns, users may:
- Search and immediately rephrase it
- Try “bhphoot meaning in English”
- Look for translation or slang explanation
- Check if it is a brand or website
- Investigate if it’s a scam or malware term
Key Takeaways
- “Bhphoot” currently has no confirmed dictionary or brand meaning
- It is most likely a typo, phonetic variation, or experimental keyword
- SEO value lies in interpretation-based content, not literal definition
- Low competition makes it an easy-ranking informational keyword
- Success depends on semantic depth and user intent coverage
FAQs About Bhphoot
1. What does Bhphoot mean?
There is no officially recognized meaning of “Bhphoot.” It appears to be a typo, variation, or experimental keyword with unclear origin.
2. Is Bhphoot a real word?
No, it is not found in standard dictionaries or linguistic databases, suggesting it is not a formal word.
3. Could Bhphoot be a brand name?
It is possible, but no widely known brand or company currently uses this term publicly.
4. Why are people searching for Bhphoot?
Most likely due to curiosity, misspelling, or exposure to the term in digital or social content without context.
5. Is Bhphoot related to any language or culture?
It may loosely resemble South Asian phonetic words like “bhoot,” but there is no confirmed linguistic origin.

In today’s digital landscape, creative platforms are becoming more important for businesses, freelancers, and online creators. One growing name that has caught the attention of many users is contact designmode24 com. Whether someone is searching for design inspiration, technical support, collaboration opportunities, or modern software solutions, this platform is steadily building a reputation among online communities.
Design-focused websites are no longer limited to visual inspiration alone. Modern users expect practical tools, responsive communication, user-friendly interfaces, and reliable customer support. DesignMode24.com appears to combine these elements into a single digital platform designed for both creative and technical audiences.
This article explores the platform’s software-related features, communication options, usability, and why users are increasingly interested in connecting with the website.
Understanding DesignMode24.com
DesignMode24.com is an online platform that shares information related to design, digital creativity, technology trends, tutorials, and modern software solutions. Instead of focusing on only one category, the website covers multiple creative and technical subjects that appeal to bloggers, developers, entrepreneurs, and designers.
The platform provides readers with articles, guides, and resources that simplify complex topics. This approach makes the website suitable for beginners as well as experienced users searching for practical digital solutions.
Many visitors look for contact information because they want to:
- Ask technical questions
- Report website issues
- Discuss advertising opportunities
- Request collaborations
- Submit guest posts
- Share content feedback
- Explore software-related inquiries
The website’s growing visibility has increased curiosity around its services and communication channels.
Why Users Want to Contact the Platform
Communication plays an important role in the success of any online platform. Users prefer websites that provide clear support systems and quick responses. DesignMode24.com attracts inquiries from different types of visitors because of its broad content coverage.
Technical Support Requests
Some users contact the platform for assistance with navigation issues, broken pages, or content accessibility. A responsive support system helps improve user satisfaction and builds trust.
Business Collaborations
Brands and digital agencies often search for collaboration opportunities with creative platforms. Businesses may contact DesignMode24.com for partnerships, sponsored content, or promotional campaigns.
Content Contributions
Freelance writers, software reviewers, and technology bloggers may reach out to contribute guest posts or tutorials related to software and digital tools.
Advertising and Promotions
Growing platforms frequently attract marketers interested in banner placements and sponsored content opportunities.
Software Features That Make the Platform Stand Out
One of the most interesting aspects of DesignMode24.com is its focus on usability and accessibility. The website appears to prioritize user experience while maintaining a clean and organized structure.
Simple Interface Design
A clutter-free interface improves readability and navigation. Users can quickly browse articles without distractions, making the platform accessible even for first-time visitors.
Mobile-Friendly Experience
Modern websites must perform smoothly across devices. Responsive layouts ensure readers can access content on smartphones, tablets, and desktops without formatting issues.
Fast Loading Performance
Website speed directly affects engagement and SEO rankings. Faster page loading helps reduce bounce rates while improving the overall browsing experience.
Organized Content Categories
The platform structures content into easy-to-follow categories. This allows visitors to locate tutorials, design resources, and software-related information efficiently.
Search Functionality
Search tools are essential for websites containing large amounts of content. Readers can quickly find articles related to specific software topics or creative solutions.
User Engagement Features
Interactive elements such as comment sections and feedback options encourage communication between readers and platform administrators.
Communication Methods Available
Users searching for DesignMode24.com contact options typically look for official support channels. Most modern websites offer multiple communication methods to improve accessibility.
Email Support
Email remains one of the most professional ways to contact digital platforms. Users can send detailed inquiries related to support, partnerships, or content contributions.
Contact Forms
Many websites use contact forms to organize incoming messages more efficiently. Forms help categorize inquiries and speed up response management.
Social Media Interaction
Creative websites often maintain active social media profiles to engage with readers and share updates.
Community Feedback
Some users prefer using comment sections or discussion areas to communicate directly regarding tutorials or software-related topics.
How to Write an Effective Inquiry
Sending a clear and professional message can improve the chances of receiving a faster response. Users should focus on clarity and relevance when contacting online platforms.
Use a Clear Subject Line
A direct subject line helps support teams identify the purpose of the message quickly.
Keep Messages Short and Informative
Long messages can become difficult to process. Include only relevant details and explain the issue clearly.
Mention Important Details
If contacting the platform about a technical problem, include screenshots, browser details, or URLs whenever possible.
Stay Professional
Polite communication creates a positive impression and increases the likelihood of helpful responses.
Key Takeaways
1. DesignMode24.com combines creative content with software-focused usability features.
2. The platform supports communication through professional contact methods and responsive interaction.
3. Fast performance, mobile compatibility, and organized navigation improve overall user experience.
Importance of User Trust in Modern Platforms
Online trust has become essential in today’s competitive digital environment. Users prefer websites that provide transparency, clear communication, and reliable information.
Trust signals often include:
- Secure website connections
- Professional design layouts
- Accurate information
- Responsive communication
- Consistent content updates
Platforms that maintain these standards generally perform better in search rankings and user engagement metrics.
For additional insights into software-focused platforms, readers can also explore resources available on:
- FIFAWorld
- Modern Software Features Guide
- Platform Guide and Features
- Tech Support Resource
- Additional Digital Resource
- Official Contact Page
High-Authority Resources Related to Digital Design
Readers interested in design software, usability, and web standards can also learn from trusted industry sources:
SEO and Visibility Benefits
Websites that provide useful support systems and optimized user experiences often achieve stronger visibility in search engines. Search engines reward websites that focus on:
- Helpful content
- Mobile responsiveness
- Fast loading times
- Clear navigation
- Secure browsing experiences
By combining creative content with practical software-related usability, platforms like DesignMode24.com can attract broader audiences.
Future Potential of Creative Platforms
As digital industries continue evolving, creative platforms are becoming more advanced. Users now expect more than simple blog content. They look for integrated tools, responsive communication systems, and user-focused experiences.
Websites that continue improving functionality and user interaction may gain long-term authority within competitive online spaces. DesignMode24.com appears positioned to benefit from this growing trend by blending creative resources with software usability principles.
Conclusion
DesignMode24.com continues attracting attention because of its blend of creative content, software-focused usability, and accessible communication methods. Users interested in collaborations, technical support, or digital resources can benefit from the platform’s organized structure and responsive features. With growing interest in modern online tools, platforms prioritizing usability, mobile optimization, and trust are more likely to succeed in competitive digital spaces. DesignMode24.com reflects this trend by offering readers practical value alongside creative inspiration and modern digital experiences.
FAQs
1. What is DesignMode24.com mainly used for?
The platform shares content related to design, technology, tutorials, creativity, and digital resources.
2. How can users contact DesignMode24.com?
Users can typically contact the platform through email support, contact forms, or social media communication.
3. Does the website focus on software features?
Yes, the platform highlights usability, navigation, responsive design, and modern digital experiences.
4. Is DesignMode24.com mobile-friendly?
The website appears optimized for mobile devices and responsive browsing experiences.
5. Why do businesses contact DesignMode24.com?
Businesses often inquire about collaborations, advertising opportunities, sponsored content, and partnerships.
When your PC starts to stutter, or your online match lags at a critical moment, the frustration is real. For many gamers using specialized optimization tools, the common question is, how to improve my gaming lcftechmods configuration? You don’t necessarily need the latest, most expensive hardware. Often, the difference between choppy gameplay and a buttery-smooth experience lies in software optimization, system configuration, and fine-tuning. This guide walks you through the essential steps to squeeze every ounce of performance from your existing setup, ensuring your mods and system work in perfect harmony.
The Software-First Approach: Optimizing from the Ground Up
The foundation of modern gaming performance is software. Your PC is a complex ecosystem where the operating system, drivers, game code, and optimization tools (like LCFTechMods) must work together. If one component is outdated or misconfigured, it creates a bottleneck.
Keep Everything Updated—Especially Drivers
The most common performance killer is outdated software. This means not just your operating system but, more importantly, your GPU drivers. Both NVIDIA and AMD release regular updates that contain game-specific optimizations and performance patches. Before you change any game settings, ensure your system is running the latest stable drivers. Software suites like LCFTechMods often provide targeted optimizations, but these are built upon the foundation of current system drivers. Ignoring these updates is like trying to race a car with flat tires.
It’s also essential that you update Windows itself. Often, these updates patch crucial aspects of the network stack or DirectX, which can have a direct impact on how your games run. When all your software is current, your optimization tools can work more effectively, ensuring peak performance.
Leverage DLSS and AI Upscaling
If you are using modern hardware, specifically an NVIDIA RTX-equipped PC (think along the lines of a robust TUF Gaming RTX 5060 Ti or similar cards), you should always check if the game supports NVIDIA DLSS (Deep Learning Super Sampling). DLSS uses AI and dedicated hardware to upscale the game’s resolution, allowing you to run it at a lower native resolution while achieving visual quality that is nearly indistinguishable from full resolution.
The performance boost from DLSS is substantial. In many demanding titles, it can double your frame rate while maintaining stunning visuals. When you are looking for how to improve my gaming lcftechmods, combining DLSS with your optimization suite is one of the most effective strategies available.
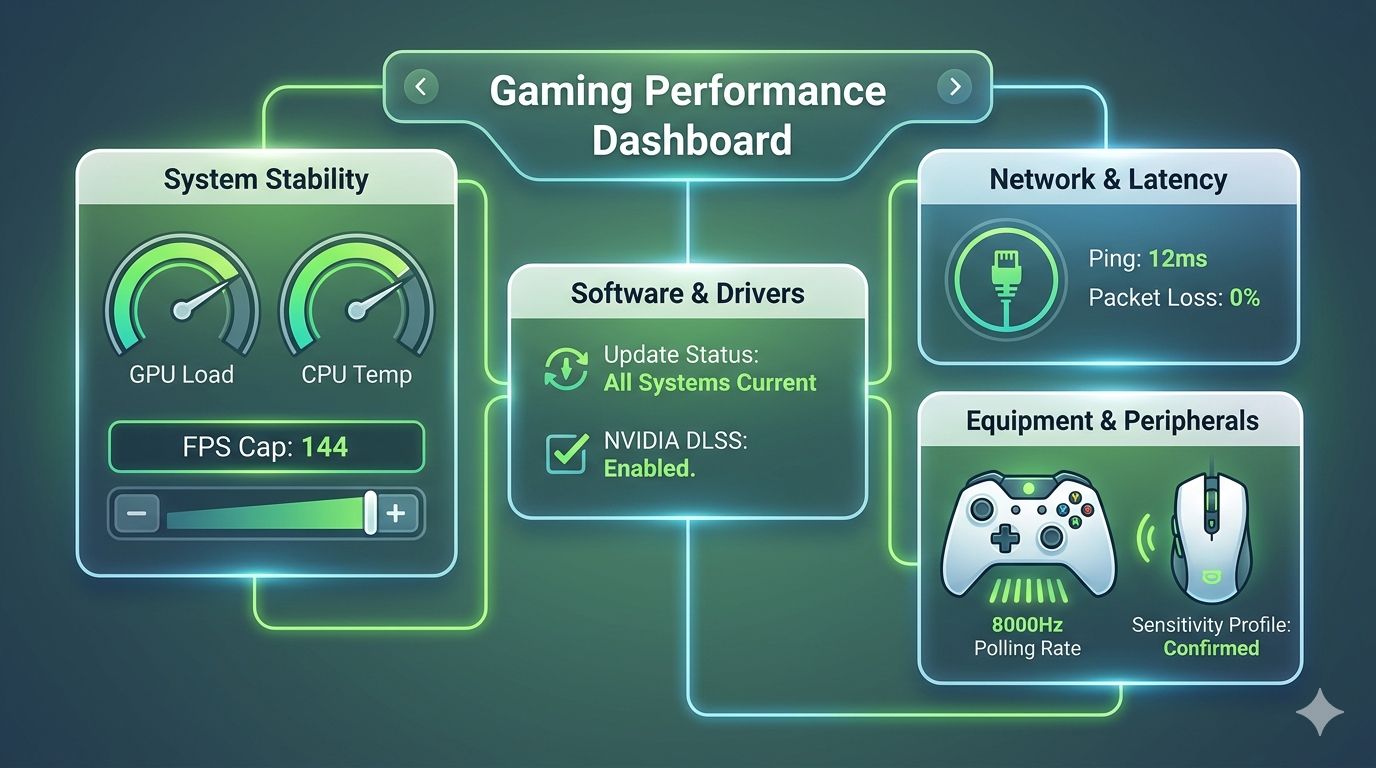
Fine-Tuning System Stability for Smoother Play
Performance isn’t just about the highest possible frame rate; it’s about consistency. A stable 60 FPS is often a much better experience than a setup that fluctuates between 50 and 100 FPS, as those dips cause noticeable stutter.
The Power of Capping Your FPS
While it seems counterintuitive to limit your frame rate, capping your FPS is one of the best ways to ensure consistent input lag and reduce GPU overheating. Your graphics card should not be running at 100% capacity constantly; this leads to thermal throttling and input inconsistency. By capping the frame rate (e.g., to your monitor’s refresh rate or slightly below), you give your GPU breathing room, resulting in a significantly smoother and more responsive gameplay experience. It also prevents your system from feeling sluggish due to the CPU or GPU becoming fully saturated.
Software Tweaks and Performance Suites
Don’t just rely on in-game settings. Often, the operating system itself requires tweaking for optimal gaming. Look for specialized performance suites and LCFTechMods-specific guides to adjust your Windows power management, disable unnecessary background processes, and prioritize game applications. These software-level adjustments ensure that all available system resources are dedicated to the game you’re playing, not to a background update or a dormant browser tab. This is where you might find solutions similar to those detailed in guides on aer-lingus tech support and customer service guide for general tech assistance.
Network and Latency: Mastering the Online Experience
In competitive online multiplayer, your network connection is just as critical as your frame rate. High latency (ping) or packet loss can make a game unplayable, regardless of how powerful your hardware is.
Embrace the Wired Connection
The number one rule of online gaming is: use a wired Ethernet connection. Wi-Fi has come a long way, but it is inherently prone to interference, packet loss, and latency spikes. A direct Ethernet cable from your router to your PC provides the most stable connection possible, eliminating packet loss and reducing the wild latency swings that get you killed in competitive matches. When people ask how to improve my gaming lcftechmods for online play, the answer almost always begins with “plug it in.“
Optimizing Your DNS Settings
While less impactful than the physical connection, your DNS (Domain Name System) settings can affect how quickly your PC translates game server addresses. Default DNS servers from your ISP are often slow or overloaded. Switching to public, high-speed DNS servers, such as those provided by Google Public DNS or Cloudflare (1.1.1.1), can minimize connection delays and improve matchmaking speed, providing a subtle but notice-able advantage in online responsiveness.
Enhancing Peripheral Performance
The connection between your physical inputs and the game’s reaction must be instant. The equipment you use and how you configure it via software plays a crucial role in this.
Polling Rate: The Hidden Latency Killer
Most standard mice and controllers have a polling rate of 125Hz or 500Hz, meaning they update your PC on their status 125 or 500 times per second. This sounds fast, but for competitive gaming, it creates input lag. Modern competitive controllers and mice, like a GameSir G7 Pro 8K, offer polling rates up to 8,000Hz. This reduces the time between a physical button press and the game’s reaction to near-instant (around 0.5ms). Making sure your peripherals are running at their highest possible polling rate via their configuration software is an often-overlooked step in any guide on how to improve my gaming lcftechmods.
Understanding Polling Rate vs. Sensitivity
While high polling rates improve responsiveness, you must differentiate them from sensitivity (DPI in mice). Polling rate is about when the signal is sent, while sensitivity is about how far the cursor or reticle moves for a given physical action. To get the perfect competitive feel, you need to use software tools to dial in both: a high polling rate for responsiveness and a comfortable, consistent sensitivity setting for accuracy.
Considering Equipment Upgrades
While our primary focus is software, hardware upgrades cannot be entirely ignored. The single most significant hardware change you can make for competitive gaming responsiveness is moving to a high-refresh-rate monitor (144Hz or greater). This, paired with a powerful system, transforms your gaming experience, making everything look and feel incredibly smooth and responsive. When you combine that hardware capability with optimized software, you reach the apex of modern gaming performance.
Customizing Software for a Seamless Experience
Beyond performance, the software that connects you to games also matters. Platform integrations, such as those that allow you to connect through a judionline808 website 1 software features and platform guide or similar portals, can streamline access and simplify connectivity, similar to the process on platforms like exploring macan808jp online and modern software features. Efficient platform integration ensures that your gaming sessions are smooth from startup to finish, reducing time wasted on connectivity issues and allowing you to focus purely on performance. For more general software and tech insights, feel free to visit fifaworld.co.uk.
Key Takeaways
Prioritize software and driver updates, particularly for your GPU and operating system.
Cap your frame rate via software to reduce input lag, stabilize system performance, and prevent overheating.
Use a wired Ethernet connection to eliminate packet loss and reduce ping spikes for smoother online play.
Balancing Your Optimizations
Improving your gaming experience isn’t about applying one single “magic tweak” but about creating a balanced system. Applying too many aggressive overclocks may cause instability. Using a massive 8,000Hz polling rate on an older, overwhelmed CPU might cause hitching. The best optimization is one that enhances your specific hardware’s strengths. Your LCFTechMods approach must be tailored to what your PC can handle.
Start by visiting trusted communities like the Steam Community Mods hub to download known, safe modifications. When exploring other tweaks, like modern controller optimizations on the GameSir Official Page, always make sure the software is trusted. The most common pitfall is installing “optimizers” that are actually bloatware.
Final Focus on Consistency
Ultimately, the goal of asking how to improve my gaming lcftechmods is to achieve consistency. A smooth, responsive, and reliable gaming system will always be more enjoyable than one that hits a high benchmark once but can’t maintain it. By focusing on keeping your software up to date, ensuring a stable and reliable network connection, and configuring your hardware and peripherals with precision, you are building a platform for both enjoyment and competitive success. Don’t chase the highest possible number; chase the smoothest possible game.
Conclusion
Understanding how to improve my gaming lcftechmods setup is the master key to achieving peak PC performance. It is less about buying top-tier hardware and more about meticulous software optimization. By capping your frame rate, ensuring your drivers and OS are current, using a stable wired connection, and dialing in your peripheral polling rates and sensitivity, you ensure a consistent and hyper-responsive gaming experience that unlocks the true potential of your PC.
FAQ
1. What is the single best way to reduce input lag?
Capping your frame rate is often the most effective method for software-based input lag reduction. It creates a stable, consistent input window and prevents your system from becoming saturated and sluggish.
2. Why should I cap my FPS when I want higher performance?
A wild, uncapped FPS causes wide variations in frame times and input latency, resulting in a choppy experience. Capping the frame rate ensures that every frame takes a similar amount of time to generate, creating a much smoother visual and input feel.
3. How do I choose between higher visual quality and better performance?
For competitive games, prioritize performance by lowering visual settings and ensuring the highest possible frame rate and consistency. For single-player experiences, you can use software tools like DLSS to achieve a perfect balance of stunning visuals and great speed.
4. Will a higher mouse polling rate make a big difference?
For competitive gaming, absolutely. A higher polling rate (like 1,000Hz or above) makes your inputs feel instantaneous and much more responsive, especially when paired with a high-refresh-rate monitor.
5. Is it really necessary to use an Ethernet cable?
Yes. Wi-Fi introduces unacceptable levels of packet loss and latency spikes for competitive gaming. A wired connection is essential for a stable and predictable online experience.

City Sports Near Me: The Complete Guide to Finding Local Athletic Activities

World Cup Tickets Kansas City: The Complete 2026 Buyer’s Guide

World Class FC: The Complete Guide to New York’s Elite Youth Soccer Club
The Ultimate Guide to Adventureppctop.com Business License: Transparency and Compliance in Digital Advertising

Beyond the Buttons: under growth games uggcontroman controller Controller Philosophy

TopTM Uncovered: The Master Framework for Elite Team Management and High-Performance Systems
-
 Business4 months ago
The Ultimate Guide to Adventureppctop.com Business License: Transparency and Compliance in Digital Advertising
-
 Blog3 months ago
Beyond the Buttons: under growth games uggcontroman controller Controller Philosophy
-
 Business3 months ago
TopTM Uncovered: The Master Framework for Elite Team Management and High-Performance Systems
-

 Blog3 months ago
Gia Derza “Leaked Video” Search Trend: What It Really Means, Risks, and the Truth Behind Viral Content
-

 Blog2 months ago
Inside Plinko Software Features: The Ultimate Guide
-

 Blog4 months ago
Pragmatic Hoki22.com: A Technical Breakdown of RNG Mechanics and Payout Algorithms
-

 Blog2 months ago
Contact DesignMode24 Com: Features and Support Guide
-

 FIFA world Cup2 months ago
Saudi Football Squad: Strategy, New Coach, & World Cup Ambitions